Rustic Italian Crusty Bread Recipe Video

This post may contain affiliate links. Read our disclosure policy.

Easy and quick artisan Italian rustic crusty bread at home, no knead, no machine, no dutch oven, with only 2 hour rise time. Made by hand with active dry instant yeast, flour and water then baked on a hot pizza stone.

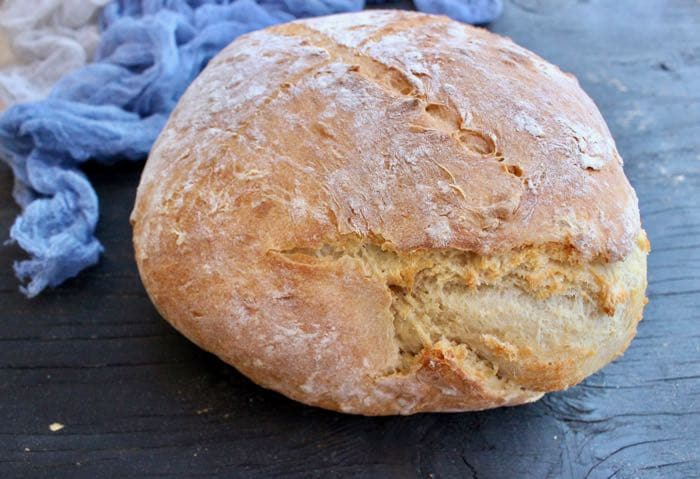
Rustic Italian Crusty Bread on a Wooden Table

Artisan Italian Crusty Bread Recipe

I made us the perfect bread for soups, stews, bruschetta and to use for sandwiches / panini all week long.

A spin on my Italian pizza dough recipe, except here i use warm water to make the bread. Just mix together flour, salt and instant yeast then let rise for 2 hours. Only 2 hours for perfect homemade bread you guys!

Then you bake it on a preheated pizza stone (<–amazon), for a peasant style loaf that crackles in your hands like a dream, yet still soft on the inside. Perfect for dipping or to dunk into a hot bowl of vegetable soup.

Rustic Italian Crusty Bread with Olive Oil

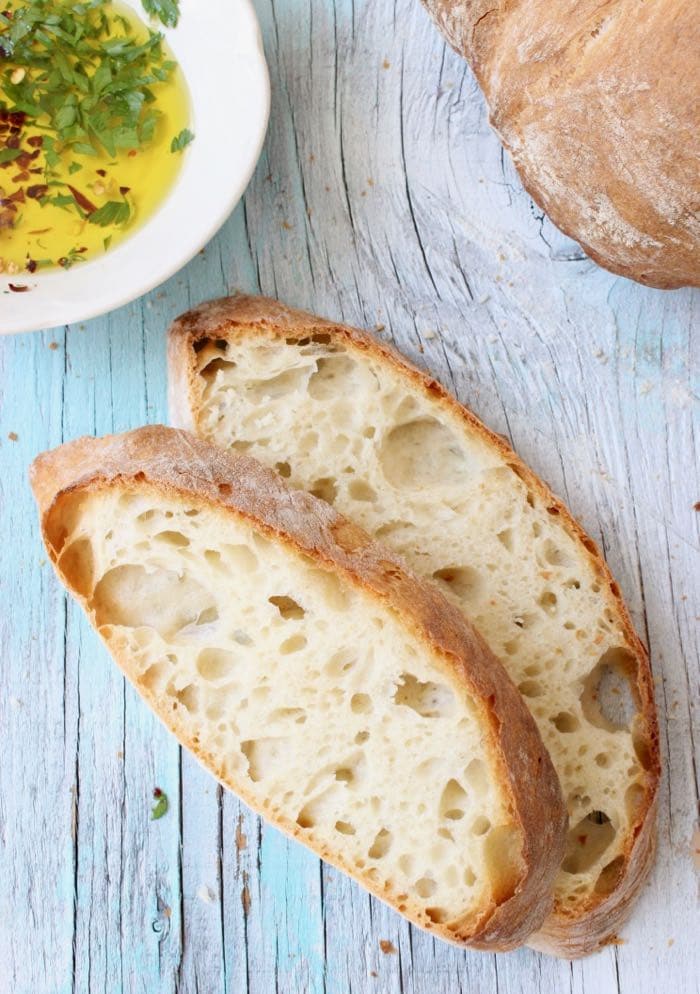
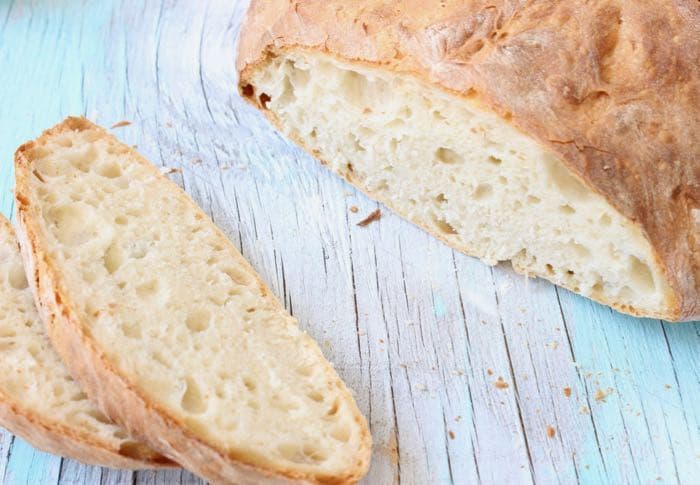
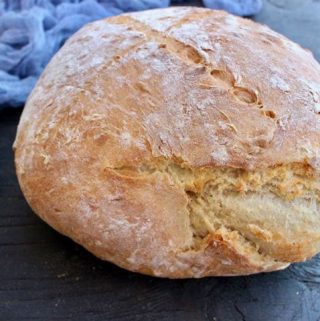
  • A good homemade bread will have a soft, fluffy center with big holes and a crust that crackles in your hand with even a gentle squeeze. It’s very important to not overwork the dough if you are looking for airy holes in your bread like the ones in the photo above.
  • Avoid the temptation to add more flour, simply dump the dough out of the bowl you mixed it in and shape into a loaf. No Kneading Allowed!
  • I swear there’s nothing like the magic of a pizza stone, however you could also bake it inside a cast iron skillet or dutch oven if you really wanted to.

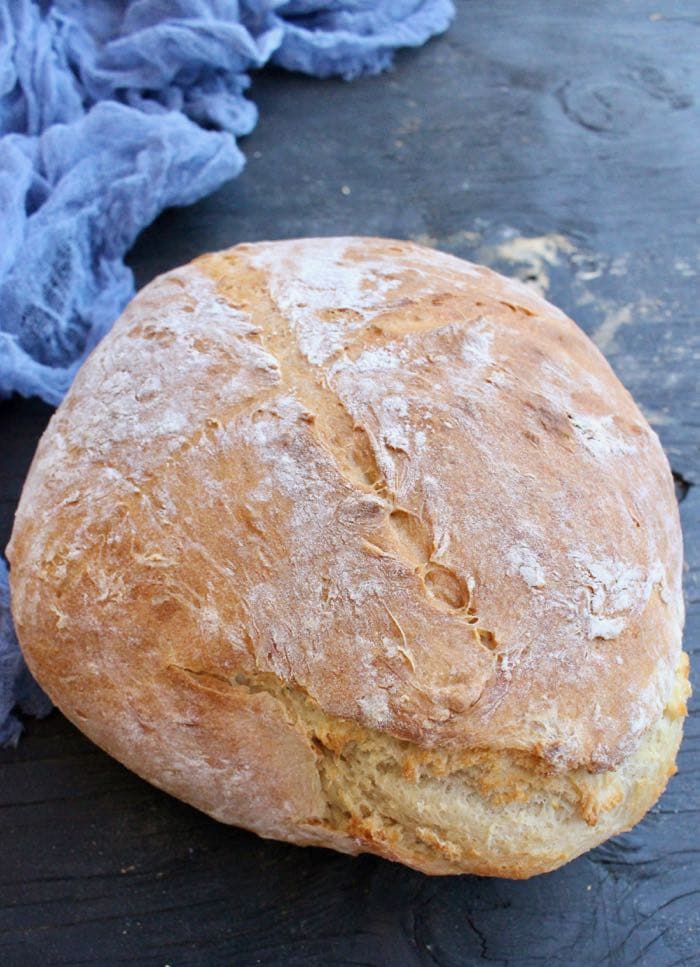
Homemade Rustic Crusty Bread Loaf

How to Serve and Eat Crusty Bread

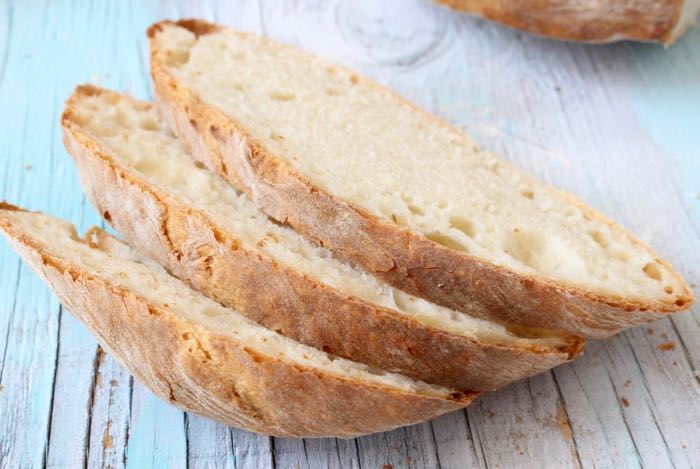
Rustic Crusty Bread Slices with Holes

What makes the bread crusty?

The secret is a  bowl of water steaming under the pizza stone while the bread is baking. The steam makes a crusty loaf!

How to Store

Allow the loaf  to cool off completely on a cooling rack on its side. Place it in a plastic bag and store on the kitchen counter at room temperature for a couple of days. I would not recommend freezing this kind of bread, instead if you find yourself with a stale chunk simply do as the Italian do: make a big pot of Ribollita or this Tuscan Pappa al Pomodoro soup.

Homemade Artisan Crusty Bread

Rustic Crusty Italian Bread Recipe Video
Rustic Crusty Bread Recipe
4.90 from 91 votes

Rustic Italian Crusty Bread Recipe

Easy and quick artisan Italian crusty bread recipe you can make at home. No knead, no machine, with only 2 hour rise time. Made with instant or active dry instant yeast, flour and water and baked on a hot pizza stone.
Print Recipe
Prep Time:5 minutes
Cook Time:40 minutes
Total Time:45 minutes

Ingredients

Instructions

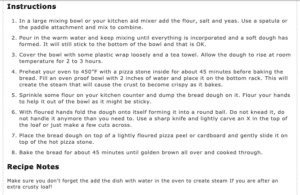
  • In a large mixing bowl or your kitchen aid mixer add the flour, salt and yeast. Use a spatula or the paddle attachment and mix to combine well.
    3.25 cups all purpose flour, 2 tsp instant yeast, 1 tsp sea salt
  • Pour in the warm water and keep mixing until everything is incorporated and a soft dough has formed. It will still stick to the bottom of the bowl and that is OK. 
    1.5 cups warm water
  • Cover the bowl with some plastic wrap loosely and a tea towel. Allow the dough to rise at room temperature for 2 to 3 hours until doubled in size.
  • Sprinkle some flour on your kitchen counter and dump the bread dough on it. Flour your hands to help it out of the bowl as it will be sticky. Don't panic, this is normal.
  • With floured hands fold the dough onto itself forming it into a round ball. Do not knead it, do not handle it anymore than you need to. Use a sharp knife and lightly carve an X in the top of the loaf or just make a few cuts across.
  • Place the bread dough on top of a lightly floured pizza peel, cardboard or parchment paper and allow it to rest while your oven is heating up.
  • Preheat your oven to 450”F with a pizza stone inside for about 45 minutes before baking the bread. Fill an oven proof bowl with 2 inches of water and place it on the bottom rack. This will create the steam that will cause the crust to become crispy as it bakes. 
  • Once your oven is hot sprinkle the pizza stone with some semolina flour or corn meal and carefully slide the bread loaf on top. Bake the bread for about 30 to 45 minutes until golden brown all over and cooked through.
  • Transfer the bread to a cooling rack and allow to cool off completely before slicing into it. You can also let it cool inside the oven with the door slightly open.

Dutch Oven Method

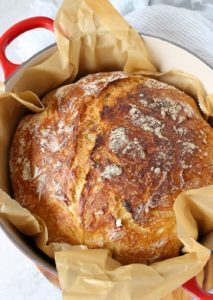
  • Instead of a pizza stone preheat your oven with a dutch oven inside. Once hot, carefully place the bread loaf inside the dutch oven ideally using parchment paper for easy transfer. Cover with the lid and bake for 30 minutes. Remove lid and bake another 5 minutes until golden brown on top. Remove the bread from the dutch oven and transfer to a cooling rack or it won't stay crispy.

Original Large Loaf Recipe:

  • Ingredients:
    1 package instant dry yeast (1/4 oz)
    6.25 cups all purpose flour + more for dusting
    2 tsp sea salt
    3 cups warm water.
    Large Loaf Italian Bread
  • Instructions: Follow the above instructions and bake at 450"F for 45 minutes.
    Italian Large Bread Loaf

Video

Notes

  • Adaptation Jan. 2021 - because some people were having trouble working with a large loaf, I adapted the recipe to make a smaller loaf that is easier to handle and that will cook evenly even without a pizza stone. Those of you more experienced bakers with a pizza stone or a bread/ pizza oven feel free to double the recipe and make a huge rustic loaf out of this.
  • Water dish - make sure you don't forget to add the dish with water in the oven to create steam If you are after an extra crusty loaf!
  • Parchment paper - If using parchment paper make sure to check the box for the max temperature it can safely be used in.
  • Keep it Crusty - make sure to allow your loaf to cool off completely on a high cooling rack so the moisture can escape through the bottom while the crust stays crispy. Alternatively allow the loaf to cool off on a rack inside the oven with door slightly open. (remove from dutch oven and discard parchment paper first).

Nutrition

Calories: 195kcal | Carbohydrates: 40g | Protein: 6g | Fat: 1g | Saturated Fat: 1g | Polyunsaturated Fat: 1g | Monounsaturated Fat: 1g | Sodium: 295mg | Potassium: 83mg | Fiber: 2g | Sugar: 1g | Vitamin C: 1mg | Calcium: 10mg | Iron: 2mg
Course: Baked Goods
Cuisine: Italian
Keyword: bread
Servings: 8 people
Calories: 195kcal
Author: Florentina

You’ll Also Love:

Rustic Pizza Dough Recipe
Best Italian Pizza Dough Recipe
Chicken Calzone Recipe
Calzone
Ciabatta Bread
Focaccia Bread with Rosemary and Tomatoes
Focaccia

Similar Posts

Leave a Reply

Your email address will not be published. Required fields are marked *

Recipe Rating


This site uses Akismet to reduce spam. Learn how your comment data is processed.

347 Comments

  1. Not sure what I did wrong but this dough was super stickyyyyy. I could not make a ball for nothing. Lol. Any advice?

    1. Hi Leslie, this is a wet dough so sticky Is normal. Please watch the Video tutorial to see the step by step handling of the dough when shaping your loaf. Sprinkle flour on your board and also some over the dough then gather the sides to form a pouch before flipping the dough so the seams end up on the bottom. To make your transfer easy Place this loaf on a piece of parchment paper and inside a bowl, this will help the dough from spilling on you and keep the loaf tight. Let it sit and bounce back for 45 minutes on the counter while the oven is heating up. You can transfer to the pizza stone pr cast iron skillet with the parchment paper for easy handling. Eventually you’ll get a hang of things after a few tries and know exactly what the dough should feel like and feel comfortable handling it wet and sticky no matter what 🙂 ~ Report back ~ Florentina Xo’s

  2. 5 stars
    I love this recipe, it’s so easy and has turned out great every time! I roasted garlic to put in the loaf I’m pulling out of the oven as I write this, it smells delicious. My only problem is that it’s such a wet dough that I can’t get it to form anything resembling a ball, and it ends up a wide flat loaf. Am I doing something wrong or is that kinda how it’s supposed to be?

    1. Hi Babs, I love the roasted garlic idea! To help with the wet dough (it’s how we get fluffy inside + crusty outside) you can sprinkle some flour around the sides of the bowl before dumping out the dough to form your loaf. Have a large piece of parchment paper ready on the counter sprinkled with flour. Flour your hands, you can sprinkle a little flour on the dough too and form your loaf, you’ll want a little resistance here. An easy way to do this is by pulling dough from sides (without breaking the gluten strands) and fold towards the center to create a pouch, then flip the loaf so the seam ends up on the bottom. At this point using the parchment paper as handles you can transfer the loaf inside an empty bowl and let it bounce back for 45 minutes while the oven is heating up. This will prevent the dough from spreading sideways and keep its shape. REMEBER you must score the dough on the top to show it which way to rise in the oven, otherwise it will burst at its weakest point and that could make it flatter. You can watch this method here in the video for the OLIVE BREAD https://ciaoflorentina.com/olive-bread/. or this one for the SPELT BREAD https://ciaoflorentina.com/homemade-spelt-bread-recipe/
      Let me know how this goes 🙂 ~ Florentina Xo’s

  3. 5 stars
    What a wonderful recipe…. It’s a keeper that’s for sure! So crispy on the outside and so soft on the inside! Thank you!

  4. I’m making this recipe now I’m at the pre heating oven and dough is on counter seems very flat I formed into a ball hardly moving it .I’m hoping it will rise when baked .

    1. Hi Linda, you can place the dough on top of a piece of parchment paper, tuck in the sides underneath to create a tighter loaf and place it with the parchment paper inside a bowl, this will prevent the dough from spreading sideways on you and make for easy transfer to the oven. Give it a good 30 to 40 minutes to rise again while the oven is heating up, this will let the gluten strands bounce back and yield a soft airy bread. This is a wet dough for that reason. Let me know how it goes ~ Florentina Xo’s

  5. 4 stars
    This bread turned out perfectly! Thank you! The only thing I want to mention is that at 7,000 feet, where I live, it took a full 90 minutes to bake. I’m used to baking recipes taking longer, but that was wow, REALLY longer. So if you’re at altitude, just know it will take much longer to bake.

    1. Hi Amy, thank you so much for sharing the elevation success tip as I am now in South Florida on the Gulf so not very high up when baking haha. So happy you enjoyed the bread and hope you will try some of my other bread recipes too ~ Florentina Xo’s

  6. 5 stars
    This recipe is a keeper. The bread is so delicious. I used bread flour and a dutch oven and made two smaller loaves. Thank you for sharing.

  7. Amazing recipe! So simple and easy—and I’ve never baked bread before!
    2 questions though:
    1) I let the dough rise for 3hrs, and then cool for two—it was about room temp when I cut and it seemed to be a bit dense; denser than in your video (though delicious still!). Any thoughts on why it was so dense and how to make it a bit airier next time?
    2) could I add olives and rosemary next time or would that disrupt the bread making process?

    1. Hi Corey! Most often than not a dense loaf is a result of overhandling the dough during shaping and not give it enough time for the gluten strands to bounce back. Here’s an easier way to deal with this: Once you shaped your final loaf place it on a piece of parchment paper and inside a shallow bowl. This method will help prevent the bread from spreading and you overhanding it again before transfer to the oven. You can use the parchment paper as handles and transfer the loaf with it to the hot stone / skillet that you should have heating up with the oven for a good 45 minutes. This will give your final loaf plenty of time to spring back and yield a fluffy loaf. If the room is cold or drafty it might take even longer, it takes a couple of tries to get a feel of how the dough should look, bounce just before baking it. Yes you make add rosemary and even olives although I just made the olive bread I’m going to post soon, it’s a riff on the Crusty Spelt Bread as I want a heartier mix able to hold up to the olives and the extra moisture they add here. I hope you give this one a try too: https://ciaoflorentina.com/homemade-spelt-bread-recipe/

  8. My husband and I absolutely love this bread! I have to hid it from him so he doesn’t eat the entire loaf which leads me to ask, is the carbs listed (40g) for 1 slice of bread?

  9. 4 stars
    Decent homemade bread has always been a challenge for me, but this came out better than previous attempts. My house is drafty in winter, so I did have to proof it in my oven, turned off but with the light on. It did deflate a bit when transferring to the pizza stone, but next time will transfer the parchment paper along with the dough. Also, I could have left it in a few minutes longer, but it was just about done enough, any less wouldn’t have been long enough to cook the dough thoroughly.

  10. How did you get the dough onto the pizza stone without it deflating and falling apart? I think mine deflated when transferring to the pizza stone. I can’t rate at this point.

  11. 5 stars
    I followed the directions for using a Dutch oven; but instead, I used my long covered baker & it came out wonderfully. My family loves this recipe!

  12. 5 stars
    Beautiful and delicious! I used instant yeast. I punched the dough after about an hour and let it continue rising for another hour. I also ensured my home was nice and warm to help it rise. It came out perfect! Thank you.

  13. Is there any adjustments I should make for baking in a higher altitude? I’m in Colorado, about 6,100 feet above sea level

  14. 5 stars
    Ciao: Thank you for the Rustic Italian Crusty Bread Recipe. It was exactly the bread we wanted to make (nice crust soft inside). My special needs daughter and I just made two loaves working semi separately. Both loaves came out great thanks to your recipe and thoughtful directions. We used the regular oven and pizza stone recipe replacing the pizza stone with a large floor tile. My bread particular German wife was completely complementary. We had to remove the bread to keep her from eating it all and she wants us to make two loaves a week! Next time we will try the big loaf version of your recipe and maybe increase the salt a bit for our tastes. Your bread with Irish / Danish or any good butter and a dash of salt is exquisite. Kiss Kiss Thank You!

    1. Oh this just fills my heart with so much joy! Thank you for giving me a glimpse into the making of memories with your daughter with my simple bread recipe at the center. I am beyond honored and so glad you all enjoyed it ~ Florentina Xo’s

  15. 5 stars
    A perfect loaf of Italian bread! I followed the recipe exactly and used a dutch oven. The sides didn’t brown as nice as a result but it browned nicely on the top and bottom. I will definitely make this again.

  16. I made this for the first time but I somehow didn’t achieve big bubbles in my loaf, so it’s much denser than in the picture. What might I have done wrong? 🙂

    1. Hi Nynn, sounds like you probably overworked the dough during shaping. In the future just make sure to give it enough time to bounce back. You could shape the loaf on a piece of parchment paper then place it inside a round bowl with the paper to help keep the shape and prevent it from spilling over. I’d say give it a good 30 minutes to rest while your oven is heating up. ~ Florentina Xo’s

      1. Thank you for your reply. When I made the dough it wasn’t all that sticky so maybe that was the first problem. I will try again 🙂

  17. 4 stars
    The first time I made this, like others I followed things and got a very flat loaf of bread that was not very fluffy, but it was ok. I make this loaf exactly as described, using INSTANT yeast, just to make that clear, and this time around I did things a little different with great results.

    First – i let the dough rise in the mixer bowl for 1 hour, lightly punched it down, then wetted my hand thoroughly and reach down the side of the dough and pulled a bit up and over the top towards the center, lightly stretching it NOT tearing. I rewetted my hands doing this – i only had to grab and pull and overlap about 5-6 times at most. This got the air out of the dough and very loosely makes a gluten structure to help with rising when baked. Then i let it rise again for about 1.5 hrs more. At this point, the dough was very puffed up and sticky.

    I then scraped the dough out onto a floured surface, and sprinkled a little flour on top and on my hands. Then i simply turned the dough in circles, pushing the lower edge under itself which started to form a nice little roundish loaf. If at this point your dough is just very loose and floppy and spreads out, now is the time to add some more flour – 1/8 cup at a time – until you get a little dough loaf that mostly holds its shape. If it’s loose and floppy, it doesn’t have the strength to hold itself up as it rises when it bakes. Do NOT add too much flour though. This is a sort of sticky dough and that makes the end result very fluffy inside. This comes with experience to know when enough is enough with flour. Just bake more bread 🙂

    Then finally I flopped the dough ball into my dutch oven, put the lid on and baked for 20min. Removed lid, and baked for 15 more. And it’s pretty darn good and crusty and rose well.

    1. Hey Cindy, I use a 4 qt but large is fine too, whatever you got that fits the loaf really. If you shape it on top of a piece of parchment paper and place inside a large bowl to rest while your oven is ready, it will be super easy to transfer with the paper. Let me know if you try ~ Florentina Xo’s

  18. 4 stars
    Easy recipe but the loaf was rather flat. Did not want to overhandle the dough. I think letting it rise longer – in a warm place – for 3-4 hours would have worked better. Tasty though and good texture.

    1. Hey G, did you use active or Instant yeast..? I found that lots of people are having issues with active yeast so I suggest switching to Instant Yeast for best results. If the temperature inside the home is colder it will naturally take longer for the dough to rise so just give it extra time. You will see tiny dots and bubbles forming over the surface and you’ll just know it’s ready. Let me know which yeast you are using ~ Florentina Xo’s